


Is Wood Wall Paneling Easy to Install? A Comprehensive Guide
Apr 27, 2023

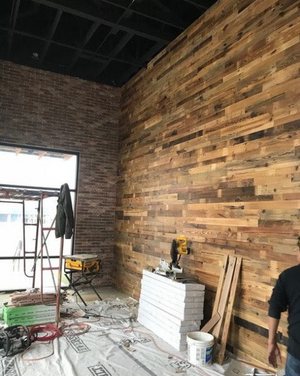
Wood wall paneling has made a strong comeback in recent years, and it's easy to see why. It offers warmth, character, and versatility to any space, making it a popular choice for homeowners and designers alike. But the question remains: is wood wall paneling easy to install? In this blog article, we will discuss the process, the tools required, and the skills needed to successfully install wood wall paneling.
- Choosing the Right Paneling
The first step in installing wood wall paneling is choosing the right type for your space. There are a variety of options available, from traditional solid wood planks to engineered wood panels, and even reclaimed wood options. It's essential to research and decide on the type of wood, the finish, and the thickness that best suits your needs and style.
- Gathering the Necessary Tools and Materials
Before diving into the installation process, gather all the necessary tools and materials. Some common items you'll need include:
- Wood paneling
- Measuring tape
- Level
- Pencil
- Stud finder
- Circular saw or miter saw
- Jigsaw
- Hammer
- Nails or wood screws
- Construction adhesive
- Sandpaper
- Wood filler
- Paint or stain (optional)
- Preparing the Surface
Properly preparing the wall surface is crucial for a successful wood paneling installation. Make sure the wall is clean, dry, and free from any debris. You'll also need to remove any existing baseboards, crown molding, or outlet covers to ensure a smooth installation process.
- Finding and Marking the Studs
To securely attach the wood paneling to the wall, you'll need to locate and mark the wall studs. Use a stud finder to identify their location and mark them with a pencil. Doing this will help you know where to nail or screw the paneling for a secure installation.
- Measuring and Cutting the Panels
Before attaching the panels to the wall, measure and cut them to the appropriate size. Use a measuring tape to determine the length and width needed for each panel, and then use a circular saw or miter saw to make precise cuts. Keep in mind that it's essential to measure twice and cut once to avoid costly mistakes.
- Installing the Panels
Once the panels are cut to size, it's time to install them. Start in a corner and work your way across the wall, using a level to ensure that each panel is straight and level. Apply construction adhesive to the back of each panel and secure them to the wall using nails or wood screws, making sure to drive them into the studs. For a seamless appearance, stagger the panel seams, so they don't line up.
- Finishing Touches
After all the panels are installed, you may need to fill any nail or screw holes with wood filler and sand the surface to create a smooth finish. If desired, you can paint or stain the panels to achieve your desired aesthetic.
Conclusion
So, is wood wall paneling easy to install? While it does require some skill, patience, and the right tools, it's a project that many DIY enthusiasts can tackle with confidence. By following these steps and taking the time to prepare and measure accurately, you can transform your space with beautiful wood wall paneling that adds warmth and character to any room.